EventBridge と StepFunctions による ECS Fargate タスクの定期メンテナンス自動化
はじめに
この記事は LITALICO Advent Calendar 2025 の 4日目の記事です。
株式会社 LITALICO で SRE グループに所属しています yhidetoshi です。 今回は 定期的に ECS タスクを入れ替えることについて書きたいと思います。
課題:ECSタスクを定期的に入れ替えたい
※ 前提として、ECS ローリングアップデートでデプロイする場合を想定して記載しています。
弊社では ECS Fargate を利用しています。ECS Fargate を運用していると、以下のように定期的に ECS のタスクを入れ替えたいケースが発生します。
1. メモリの定期的な解放
リリースサイクルが長く、AutoScaling もあまり発生しないプロダクトでは、同じ ECS タスクが長時間起動し続ける傾向にあります。 このような場合、アプリケーションの特性によってはメモリリークがなくとも、定期的にタスクを入れ替えてメモリを解放したいというニーズがあります。
2. AWS Fargate のタスクメンテナンス対応
AWS Fargate は、基盤となるインフラのパッチ適用のために、定期的にタスクのメンテナンス(AWS_ECS_TASK_PATCHING_RETIREMENT)を行います。
You are receiving this notification because AWS Fargate has deployed a new platform version revision...
このメンテナンス自体は AWS によって自動的に行われますが、以下の理由から、能動的に対応したい場合があります。
サービス影響のコントロール:
AWS によるメンテナンスの実行タイミングに任せると、サービスアクセスが多い時間帯にタスクの入れ替えが発生する可能性があります。あらかじめ深夜帯などサービス影響の少ない時間帯に、こちら側で再デプロイ(タスク入れ替え)を実行しておくのが無難です。
キャパシティ減少のリスク回避:
AWS_ECS_TASK_PATCHING_RETIREMENT には、以下のドキュメントに記載されているような制約があり、注意が必要です。
「Amazon ECSが代替タスクを起動できない場合、停止対象のタスク(retired tasks)は代替なしで停止されます。これにより、サービスの利用可能なキャパシティが減少し、サービス中断を引き起こす可能性があります。」
現状の運用(GitHub Actions)とデメリット
現在、この定期的なタスク入れ替え(force new deployment の実行)を GitHub Actions の schedule (cron) で実行しており、以下のようなデメリットがあります。
1. GHA の cron の属人性:
GHA で cron を設定すると、そのワークフローを定義(または最後に更新)した GitHub ユーザーに紐づいてしまいます。もし、そのユーザーがリポジトリから削除されたり、退職したりすると、スケジュールされていた cron が実行されなくなります。
2. GHA の実行時間の消費:
GHA は実行時間(分)に基づいて課金されます。 force new deployment を実行する GHA ワークフローは、タスクの入れ替えが完了するまで待機することが多く、実行時間が長くなりがちです。 実環境で計測したところ、1回の定期実行で 2時間20分 も GHA の実行時間を消費していました。
3. 複雑なエラーハンドリングとリトライ処理:
ecs:UpdateService(force new deployment)の API は非同期で実行されるため、API を実行した時点では「デプロイの受付が完了した」だけであり、「デプロイが正常に完了した」わけではありません。
デプロイが本当に成功したか(COMPLETED)、あるいは失敗したか(FAILED)を知るためには、GHA のワークフロー側で ecs:DescribeServices を定期的にポーリング(ループ実行)し、ステータスを確認し続ける必要があります。 GHA でこの「ポーリング」「失敗時のリトライ」といったロジックを実装するのには手間がかかります。 もしデプロイが失敗しても、それを検知できずにワークフローが「成功」として終了してしまう可能性がありました。
やったこと(実装概要)
EventBridge で定期実行(cron)を設定し、ターゲットの StepFunctions を起動します。 StepFunctions は、対象の全 ECS サービスに対して Force new deployment (ecs:UpdateService API の forceNewDeployment=true オプション)を実行します。
また、StepFunctions の実行が失敗した場合は、Datadog でStepFunctions の実行ステータスをモニタリングしているので、 Datadog から Slack にアラートを送ることで実行失敗に気付けるようにしています。
ref. Amazon ECS サービスを更新する
StepFunctions で工夫した点
StepFunctions を設計する上で、特に以下の2点に工夫が必要でした。
1. MapState による並列実行:
弊社のあるプロダクトではマイクロサービスアーキテクチャを採用しており、定期実行の対象となる ECS Service が 30 程度あります。 これらを直列で実行すると全体の完了までに時間がかかってしまうため、MapState を利用して、全サービスに対する force new deployment を並列で実行するようにしました。
2. Payload サイズ制限の回避:
AWS Step Functions には、状態(ステップ)間の入出力 Payload サイズに 256KB の上限があります。
MapState は、並列実行したすべての子ステップの結果を配列として集約して次の状態に渡します。今回のように 30 ものサービスに対して ecs:UpdateService を実行すると、その実行結果(詳細なサービス定義情報を含むJSON)がすべて集約され、配列全体で 256KB の上限を超えてしまいました。
実際に、以下のようなエラーが発生しました。
The state/task 'MapState' returned a result with a size exceeding the maximum number of bytes service limit.
この問題を回避するため、MapState の中で ResultSelector を利用し、API の実行結果から本当に必要な情報だけを抽出して返すようにしました。
実行対象の Service が少なく、MapState の集約結果が 256KB を超えない場合は、この対応は必要ありません。
StepFunctions の定義は以下のようにしました。※ Terraform の一部抜粋
resource "aws_sfn_state_machine" "ecs_refresh_service" {
  name     = "${local.project_name}-${local.stage}-ecs-refresh-service"
  role_arn = aws_iam_role.ecs_refresh_service.arn
  definition = jsonencode(yamldecode(<<EOF
Comment: Refresh multiple ECS Services in parallel
StartAt: MapState
States:
  MapState:
    End: true
    ItemsPath: $.services
    Iterator:
      StartAt: UpdateService
      States:
        UpdateService:
          Next: WaitForDeployment
          Parameters:
            Cluster: ${local.project_name}-${local.stage}-cluster
            ForceNewDeployment: true
            Service.$: $.service
          ResultSelector:
            RolloutState.$: $.Service.Deployments[0].RolloutState
          ResultPath: $.RolloutState
          Resource: arn:aws:states:::aws-sdk:ecs:updateService
          Retry:
            - BackoffRate: 1
              ErrorEquals:
                - States.ALL
              IntervalSeconds: 10
              MaxAttempts: 2
          Type: Task
        CheckDeployment:
          Next: EvaluateStatus
          Parameters:
            Cluster: ${local.project_name}-${local.stage}-cluster
            Services.$: States.Array($.service)
          ResultSelector:
            RolloutState.$: $.Services[0].Deployments[0].RolloutState
          ResultPath: $.DescribeResult
          Resource: arn:aws:states:::aws-sdk:ecs:describeServices
          Retry:
            - BackoffRate: 1
              ErrorEquals:
                - States.ALL
              IntervalSeconds: 10
              MaxAttempts: 1
          Type: Task
        EvaluateStatus:
          Type: Choice
          Choices:
            - Variable: $.DescribeResult.RolloutState
              StringEquals: COMPLETED
              Next: DeploymentSuccess
            - Variable: $.DescribeResult.RolloutState
              StringEquals: IN_PROGRESS
              Next: WaitForDeployment
            - Variable: $.DescribeResult.RolloutState
              StringEquals: FAILED
              Next: DeploymentFailed
          Default: WaitForDeployment
        DeploymentFailed:
          Cause: The ECS service deployment failed or timed out.
          Error: DeploymentFailed
          Type: Fail
        DeploymentSuccess:
          Type: Succeed
        WaitForDeployment:
          Next: CheckDeployment
          Seconds: 300
          Type: Wait
    MaxConcurrency: 40
    Type: Map
EOF
  ))
}
EventBridge の設定:対象サービスリストを渡す
対象とする ECS Service は以下のように JSON を定義して、ペイロードを作成しました。
locals.tf の一部抜粋
locals {
  group_name            = "default"
  eventbridge_rule_name = "${local.stage}-ecs-refresh-service"
  state = {
    # (省略)
    prd   = "ENABLED"
  }
  description               = "ECS Service を再デプロイ(ForceNewDeployment)する"
  flexible_time_window_mode = "OFF"
  schedule_expression = {
    # (省略)
    prd   = "※ cron 式を書く"
  }
  schedule_expression_timezone = "Asia/Tokyo"
  maximum_window_in_minutes    = null
  maximum_event_age_in_seconds = 60
  maximum_retry_attempts       = 1
  target_sfn_arn               = data.terraform_remote_state.ecs_refresh_service.outputs.step_functions_ecs_refresh_arn
  input_message                = <<EOF
  {
      "services": [
        {
          "service": "service-a"
        },
        {
          "service": "service-b"
        },
        {
          "service": "service-c"
        },
        # (省略)
        {
          "service": "service-z"
        }
      ]
  }
  EOF
  }
- terraform コードの一部抜粋 (eventBridge)
resource "aws_scheduler_schedule" "this" {
  name        = "${local.project_name}-${local.eventbridge_rule_name}"
  group_name  = local.group_name
  state       = local.state[local.stage]
  description = local.description

  flexible_time_window {
    mode                      = local.flexible_time_window_mode
    maximum_window_in_minutes = local.maximum_window_in_minutes
  }
  schedule_expression_timezone = local.schedule_expression_timezone

  schedule_expression = local.schedule_expression[local.stage]

  target {
    arn      = local.target_sfn_arn
    role_arn = aws_iam_role.sfn_role.arn
    input    = local.input_message
    retry_policy {
      maximum_event_age_in_seconds = local.maximum_event_age_in_seconds
      maximum_retry_attempts       = local.maximum_retry_attempts
    }
  }
}
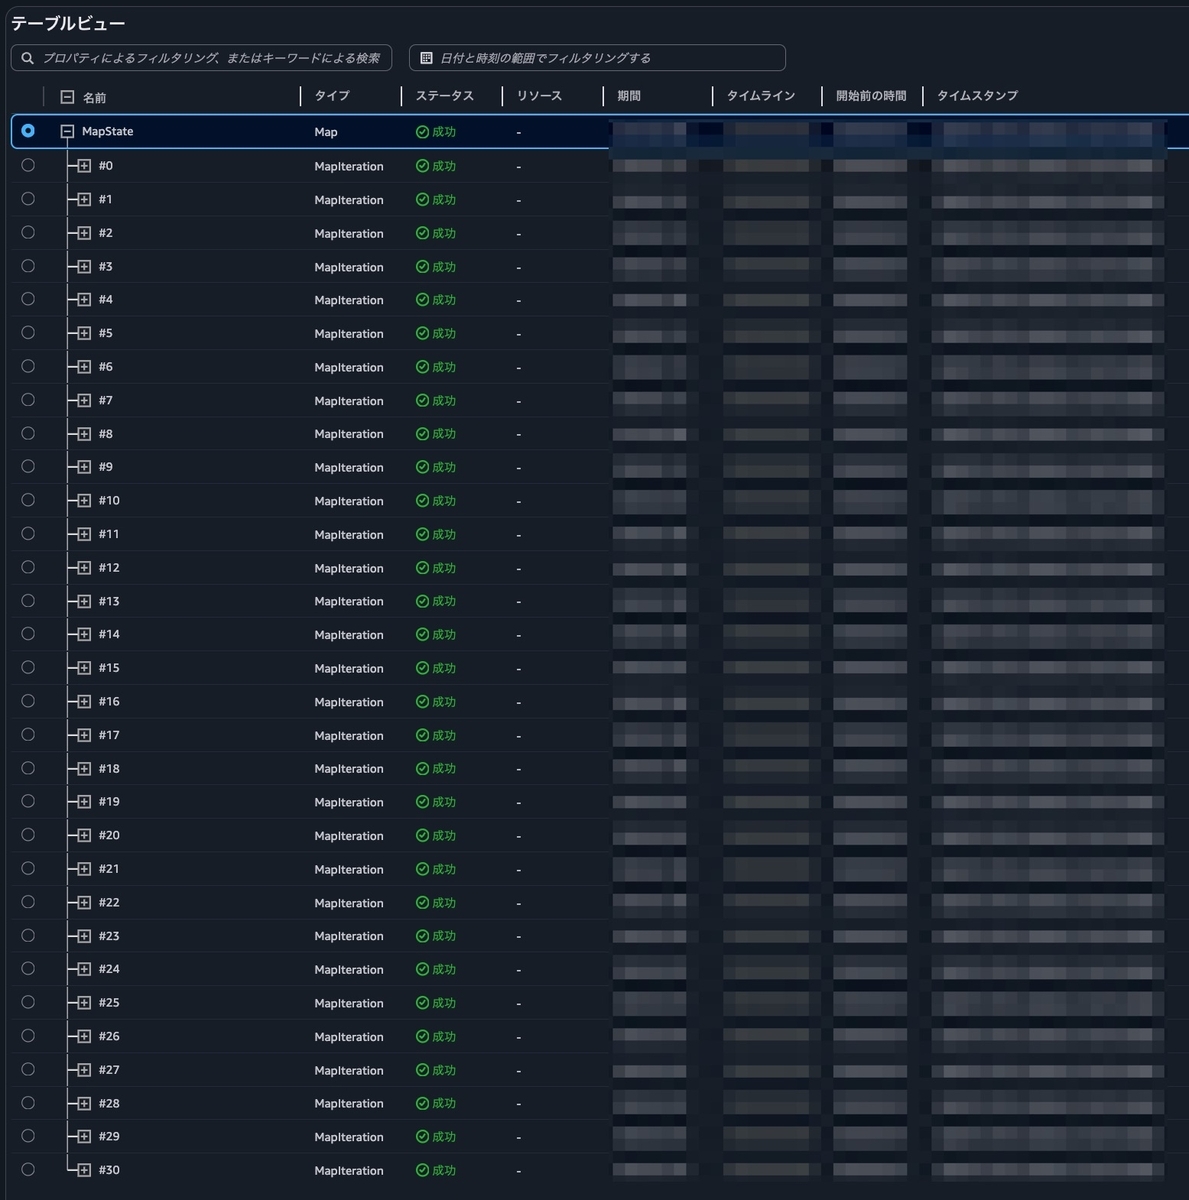
実行結果
指定した Service リストを並列に実行した結果。

安全なデプロイのための注意点
今回のように force new deployment をする場合、現在稼働中の古いタスクを停止し、新しいタスクと入れ替えるローリングアップデートを実行します。 このとき、実行中のリクエスト処理が完了する前にタスクが強制終了してしまうことを防ぐため、ALB ターゲットグループの 「登録解除の遅延 (deregistration delay)」 を適切に設定しておく必要があります。
まとめ
本記事では、ECS Fargate タスクの定期的な入れ替え(メモリ解放や AWS_ECS_TASK_PATCHING_RETIREMENT 対応)という運用課題に対し、AWS のサーバーレスサービスを使って解決した方法を紹介しました。
従来 GitHub Actions の schedule で実行していた運用には、属人性(実行ユーザーの退職リスク)や GHA 実行時間の消費(コスト)といったデメリットがありました。
これらを解決するため、EventBridge Scheduler で定期実行し、StepFunctions で force new deployment を実行するアーキテクチャに変更しました。
この構成のメリットは以下の通りです。
- AWS ネイティブなサービスで完結するため、GHA のような属人性の問題を排除できる。
- StepFunctions は GHA のランナー時間のような実行時間課金を気にせず、待機時間を含む処理を低コストで任せられる。
- MapState を利用することで、対象サービスが多数(30以上)あっても効率的に並列実行できる。
実装の工夫として、MapState が返す結果を集約する際の Payload 256KB 制限を ResultSelector で回避する方法も紹介しました。
最後に、最も重要な注意点として、安全なローリングアップデートのためには ALB の 「登録解除の遅延 (deregistration delay)」 をアプリケーションの特性に合わせて適切に設定することが不可欠です。 ECS Fargate の運用をより安定させ、コスト効率を高めるための一例として、この記事がどなたかの参考になれば幸いです。
Renovate による Pull Request を auto-merge してレビューコストを削減する
はじめに
この記事は LITALICO Advent Calendar 2024 の 4日目の記事です。
株式会社 LITALICO で SREグループに所属しています yhidetoshi です。 今回は Renovate による Pull Request を auto-merge してレビューコストを削減した話を書きたいと思います。
課題
LITALICO の SRE グループではライブラリのアップデートに Renovate を導入しています。
Renovate is an automated dependency update tool. It helps to update dependencies in your code without needing to do it manually. When Renovate runs on your repo, it looks for references to dependencies (both public and private) and, if there are newer versions available, Renovate can create pull requests to update your versions automatically.
Renovate の導入が進むつれて定期実行時に大量の Pull Request が作成されレビューコストの増大が課題となっていました。
本記事のスコープ
本記事では、Renovate の導入済み状態から auto-merge を導入するために実施したことを記載します。 Renovate で auto-merge する対象は CI/CD 関連のライブラリです。アップデートのバージョンで CI を実行して成功した場合に Pull Request を merge します。 ランタイムのアップデートなどはしっかり動作確認しないとサービス影響がでる可能性があるため auto-merge 対象外にしています。 本記事では、Terraform を管理しているリポジトリを例に記載しました。 なお、Renovate は GitHub Actions の hosted runner 上で動作しています。
やったこと
Terraform Plan/Apply を実行するワークフローでは、複数のライブラリを利用しておりライブラリの定期的なアップデートが必要になります。 古いバージョンのまま放置せず、renovate を定期実行して最新にアップデートしていく方針にしています。 auto-merge 後に terraform apply を実行しないので、バージョンを更新して不具合があればバージョンを戻せば済み、 breaking change、deprecated になったものは適宜対応しています。 それでは、auto-merge を導入するためにやったことを記載していきます。
Renovate で auto-merge する流れ
- アップデート対象が auto-merge 対象のライブラリである場合、作成された Pull Request に
renovate-automergeラベルが付与される renovate-automergeラベルが付与された Pull Request に対して、バージョンアップの確認 CI(今回の場合は terraform plan)が実行される- CI(terraform plan)が成功した場合、workflow 経由で 対象の Pull Request に approve される
- Pull Request が approve されたら auto-merge される
Renovate の設定
今回、auto-merge の対象にしたライブラリは以下です。
- hashicorp/aws
- DataDog/datadog
- carlpett/sops
- hashicorp/terraform
- gruntwork-io/terragrunt
- aquaproj/aqua-registry
- suzuki-shunsuke/tfcmt
- aquaproj/aqua
- actions/create-github-app-token
今回、以下の設定を renovate.json に設定しました。
"Renovate で auto-merge する流れ" の 1, 4 に関しては 下記の renovate.json で設定。
- matchPackageNames
- auto-merge 対象のライブラリを指定する
- matchUpdateTypes
- 自動マージを patch または minor バージョンアップに限定する
- major バージョンは破壊的変更が入る場合も考慮して現状では対象外にしている
- addLabels
- Renovate による PR 作成時に "renovate-automerge" ラベルを自動で付与する
- 後述しますが、Pull Rquest が auto-merge 対象のものかを判別するために利用
- platformAutomerge
- true に設定し、必要なレビューとステータスチェックが完了した場合に PR を自動マージする
- ignoreTests
- false に設定し、CI が成功した場合のみ auto-merge を実行するようにする
- 1 approve が必要だが確認用の CI が無い場合や、patch バージョンならすべて merge する場合などは true にして使える
renovate.json:
{
  "labels": [
    "Renovate"
  ],
  "prHourlyLimit": 0,
  "prConcurrentLimit": 10,
  "enabledManagers": [
    "github-actions",
    "terraform",
    "terragrunt",
    "custom.regex"
  ],
  "packageRules": [
    {
      "matchPackageNames": [
        "hashicorp/terraform",
        "hashicorp/aws",
        "DataDog/datadog",
        "carlpett/sops",
        "gruntwork-io/terragrunt",
        "aquaproj/aqua-registry",
        "suzuki-shunsuke/tfcmt",
        "aquaproj/aqua",
        "actions/create-github-app-token"
      ],
      "addLabels": [
        "renovate-automerge"
      ],
      "matchUpdateTypes": [
        "minor",
        "patch"
      ],
      "automerge": true,
      "platformAutomerge": true,
      "ignoreTests": false
    }
  ],
  "extends": [
    "config:recommended",
    ":disableDependencyDashboard",
    "github>aquaproj/aqua-renovate-config#2.3.1"
  ],
  "customManagers": [
    {
      "customType": "regex",
      "fileMatch": ["(^|/)\\.aqua-version$"],
      "matchStrings": ["(?<currentValue>\\d+\\.\\d+\\.\\d+)"],
      "datasourceTemplate": "github-releases",
      "depNameTemplate": "aquaproj/aqua",
      "extractVersionTemplate": "^v(?<version>.*)$"
    }
  ]
}
auto-merge の PR を approve する
次に、"Renovate で auto-merge する流れ"の 2, 3 に関しては、以下の workflow を用意しました。
Renovate auto-merge で処理を共通化できる部分は、composite-actions 化して 様々なリポジトリから参照する運用にしています。
内容としては、auto-merge するかを判断するラベル renovate-automerge が付与されている場合に Pull Request を approve するものになります。
ラベルが付与されていない場合は skip されます。
pr_auto_approve/action.yml (composite actions 側):
# 以下の権限を持ったTokenを渡して下さい
#  pull-requests: write
name: Approve pull request
description: 'Automatically approve pull request'

inputs:
  github_token:
    type: string
    required: true
    description: 'GitHub token used for authentication'
  label_name:
    type: string
    required: true
    description: 'Label used for auto-merging pull requests'

runs:
  using: "composite"
  steps:
    - name: Check if label exists
      id: check-label
      uses: actions/github-script@v7
      with:
        github-token: ${{ inputs.github_token }}
        result-encoding: string
        script: |
          const pr = await github.rest.pulls.get({
            owner: context.repo.owner,
            repo: context.repo.repo,
            pull_number: context.payload.workflow_run.pull_requests[0].number,
          })
          const hasLabel = pr.data.labels.some(label => label.name === '${{ inputs.label_name }}')
          return JSON.stringify(hasLabel)
    - name: Get result # 確認用
      run: echo "${{ steps.check-label.outputs.result }}"
      shell: bash
    - name: Approve Pull Request
      if: ${{ steps.check-label.outputs.result == 'true' }}
      uses: actions/github-script@v7
      with:
        github-token: ${{ inputs.github_token }}
        script: |
          await github.rest.pulls.createReview({
            owner: context.repo.owner,
            repo: context.repo.repo,
            pull_number: context.payload.workflow_run.pull_requests[0].number,
            event: "APPROVE"
          })
auto-merge するために、アップデートしたバージョンで CIを実行して動作確認します。
上記に composite actions 側を記載したので、以下に auto-merge するリポジトリに設定する workflow を記載します。
内容としては、動作確認の CI が成功して完了した事をトリガーに実行します。
pr_auto_approve (composite actions の呼び出し側):
name: "Pull Request Approve"
on:
  workflow_run:
    workflows:
      - terraform_plan # ライブラリアップデートを確認する workflow 名を指定する
    types:
      - completed

permissions:
  pull-requests: write

jobs:
  approve:
    if: ${{ github.event.workflow_run.conclusion == 'success' }}
    runs-on: ubuntu-24.04-2core-arm64
    timeout-minutes: 3
    steps:
      - name: approve pull request
        uses: example_composite_actions_pr_auto_approve # composite-actions を指定
        with:
          github_token: ${{ secrets.GITHUB_TOKEN }}
          label_name: "renovate-automerge"
課題
この auto-approve を導入するにあたって課題がありました。 それは、Renovate によって作成された Pull Request にどのように approve して merge するかです。
コードレビューのルールとしては以下で運用しています。
- Pull Request のレビュワーは SRE メンバーが登録された team を利用し、CODEOWNERD を使ってアサインをしている
- Branch protection rule を利用して、Pull Request の merge には最低一人に approve されるまではブロックしている
Require approvals: Required number of approvals before merging 1
そして、CODEOWNERS を利用している事で以下を考慮しました。
1. CODEOWNERS の利用による制約
- CODEOWNERS を設定すると、指定されたメンバーが approve するまで merge がブロックされる
- CODEOWNERS メンバー、つまり SRE メンバーによる approve が必要になり、auto-merge が実行できない
2. CODEOWNERS 設定の意図と実情
- 今まで CODEOWNERS は主にレビュワーをアサインする目的で利用しており、特段 merge をブロックする目的では使っていなかった
- 仮に CODEOWNERS 以外が merge してもその変更をサービスに反映するには GitHub Actions の実行が必要だが、権限を制限しているため CODEOWNERS は必須要件ではなかった
これらによって、CODEOWNERS を解除して、レビュワーアサインのための workflow を追加しました。 追加した workflow は以下です。こちらも pr_auto_approve と同様に composite-actions 化して対応しました。
pr_auto_assign.yaml(composite actions の呼び出し側):
name: "Pull Request Auto Assign"
on:
  pull_request:
    types:
      - opened
      - ready_for_review

jobs:
  add-reviews:
    if: ${{ github.event.pull_request.draft == false }}
    runs-on: ubuntu-24.04-2core-arm64
    steps:
      - name: add-reviews
        uses: example_composite_actions_pr_auto_assign # composite-actions を指定
        with:
          team_slug: sre
          github_app_id: ${{ secrets.EXAMPLE_GITHUB_APP_ID }}
          github_app_private_key: ${{ secrets.EXAMPLE_GITHUB_APP_PRIVATE_KEY }}
pr_auto_assign/action.yml (composite actions 側):
# 以下の権限を持ったTokenを渡して下さい
#  pull-requests: write
name: Assign pull request reviewers
description: 'Automatically assign pull request'

inputs:
  team_slug:
    required: true
    description: 'slug of the team name'
  github_app_id:
    required: true
    description: 'GitHub App ID to generate App Token'
  github_app_private_key:
    required: true
    description: 'Private key for GitHub App to generate App Token'

runs:
  using: "composite"
  steps:
      - name: Generate token
        id: generate_token
        uses: actions/create-github-app-token@v1.11.0
        with:
          app-id: ${{ inputs.github_app_id }}
          private-key: ${{ inputs.github_app_private_key }}
          owner: ${{ github.repository_owner }}
      - name: Add reviewers
        uses: actions/github-script@v7
        with:
          github-token: ${{ steps.generate_token.outputs.token }}
          script: |
            const owner = context.repo.owner;
            const repo = context.repo.repo;
            const pr_number = context.payload.pull_request.number;
            const team_slug = '${{ inputs.team_slug }}';
            await github.rest.pulls.requestReviewers({
              owner: owner,
              repo: repo,
              pull_number: pr_number,
              reviewers: [],
              team_reviewers: [team_slug]
            });
最後に"Renovate で auto-merge する流れ"の 4 に関しては、renovate.json の platformAutomerge のためにGitHub リポジトリに以下の設定をしました。
Settings: Pull Requests => Allow auto-merge を有効化:

auto-merge された Pull Request の例
以下は、terragrunt に関して auto-merge された Pull Request です。
- Renovate により作成された Pull Request に
renovate-automergeラベルが付与された - Pull Request に対してバージョンアップの確認 CI(terraform plan)が実行された
- CI(terraform plan)が成功し workflow 経由で 対象の Pull Request に approve された
- auto-merge の条件を満たし workflow から 1 approve されて auto-merge された

まとめ
本記事では、Renovate の導入に伴い SRE メンバーのレビューコストが増大するという課題に対し、CI/CD 関連に限定し、サービスに影響を与えないライブラリのみに絞って Pull Request を auto-merge する仕組みを導入した事例を紹介しました。
tagprでPRベースでタグを管理する
はじめに
githubでタグでバージョン管理するときにtag打ちとリリースノートの作成を手動で行うのは面倒だと思っていました。 tagprというOSSがリリースされてtag打ちとリリースノートをworkflowで自動で行なってくれるので今回使ってみました。
設定
.github/workflows/tagpr.yml
name: tagpr
on:
  push:
    branches:
      - main
jobs:
  tagpr:
    runs-on: ubuntu-latest
    timeout-minutes: 3
    steps:
      - name: Checkout
        uses: actions/checkout@v3

      - name: Tagpr
        uses: Songmu/tagpr@main
        id: tagpr
        env:
          GITHUB_TOKEN: ${{ secrets.GITHUB_TOKEN }}
.github/release.yml- リリースノートの設定について設定します。
- PRに
tagprをタグを付与したものは除外する設定を追加
changelog:
  exclude:
    labels:
      - tagpr
- .tagpr
- https://github.com/Songmu/tagpr#configuration
- tagprを設定するファイル
vPrefix = true: tagにvのprefixを付与するかどうかreleaseBranch: リリースブランチを指定
- tagprを設定するファイル
- https://github.com/Songmu/tagpr#configuration
# config file for the tagpr in git config format
# The tagpr generates the initial configuration, which you can rewrite to suit your environment.
# CONFIGURATIONS:
#   tagpr.releaseBranch
#       Generally, it is "main." It is the branch for releases. The tagpr tracks this branch,
#       creates or updates a pull request as a release candidate, or tags when they are merged.
#
#   tagpr.versionFile
#       A versioning file containing the semantic version needed to be updated at release.
#       It will be synchronized with the "git tag".
#       Often this is a meta-information file such as gemspec, setup.cfg, package.json, etc.
#       Sometimes the source code file, such as version.go or Bar.pm, is used.
#       If you do not want to use versioning files but only git tags, specify the "-" string here.
#
#   tagpr.vPrefix
#       Flag whether or not v-prefix is added to semver when git tagging. (e.g. v1.2.3 if true)
[tagpr]
    vPrefix = true
    releaseBranch = main
    versionFile = -
実際に利用してみる
- tag: v0.0.3 の状態で
#3のPRをmainブランチに対してマージするとworkflowが走る - PR
Release for v0.0.4 #4が作成される(下記画像)

- この状態で
#5のPRをmainブランチに対してマージするとworkflowが走りRelease for v0.0.4 #4のWhats Changedに追加される

このように、tagprのworkflowで指定しているブランチに対してPRを作成していき任意のタイミングでtagをきるさいにこの Release for v0.0.4 #4 のPRをマージする
- この状態で
Release for v0.0.4 #4のPRをマージします。そうるすと、workflowが走りtagとreleaseノートが発行される

特にタグを指定しないとパッチバージョンがインクリメントされます。
ここで、マイナーバージョンを上げるためには tagpr:minor をラベルに付与します。メジャーバージョンを上げるには同様に tagpr:major をラベルに付与します。
ref) GitHub - Songmu/tagpr: automatically creates and updates a pull request for unreleased items, tag them when they are merged, and create releases.
今回は試しに、マイナーバージョンを上げるために tagpr:minor のラベルを Release for v0.0.5 に付与してPRをマージしました。↓
- PRに
tagpr:minorラベルを付与

- マイナーバージョンがアップデートされた (v0.0.4 --> v0.1.0)

tag発行をトリガーとして利用する
tagprで作成されたPRをマージするとworkflowが実行されtagが打たれてリリースされる。 このタイミングで何かしらアクション、(例えばデプロイ)などする場合に下記のようにして 任意の処理を実行することも可能です。
.github/workflows/tagpr.yml
name: tagpr
on:
  push:
    branches:
      - main

jobs:
  tagpr:
    runs-on: ubuntu-latest
    timeout-minutes: 3
    outputs:
      tagpr-tag: ${{ steps.exec-tagpr.outputs.tag }}
    env:
      GITHUB_TOKEN: ${{ secrets.GITHUB_TOKEN }}
    steps:
      - name: Check out source code
        uses: actions/checkout@v3

      - name: Exec-tagpr
        id: exec-tagpr
        uses: Songmu/tagpr@v1

  deploy_something:
    runs-on: ubuntu-latest
    timeout-minutes: 3
    needs: tagpr
    env:
      TAG_VERSION: ${{ needs.tagpr.outputs.tagpr-tag }}

    steps:
      - name: Show tag
        if: needs.tagpr.outputs.tagpr-tag != ''
        run: |
          echo ${{ env.TAG_VERSION }}
さいごに
今回、githubのタグを管理する方法としてtagprを検証しました。PRベースでタグとリリースノートが自動で作成でき、バージョンアップのメジャー、マイナー、パッチも PRにタグを付与することで設定できたのでとても便利でした。個人開発のリポジトリに導入して利用していこうと思います。
Lambdaレイヤーを利用してラインタイムPython上でgoバイナリを実行 & レイヤーをバージョン管理する
今回はLambdaレイヤーについて簡単な検証とレイヤーのバージョン管理について検証しました。
Lambdaレイヤーとは
Lambda レイヤーは、Lambda 関数で使用できるライブラリとその他の依存関係をパッケージ化するための便利な方法を提供します。レイヤーを使用することで、アップロードされたデプロイメントアーカイブのサイズを削減し、コードをデプロイするスピードを速めることができます。 レイヤーは、追加のコードまたはデータを含むことができる .zip ファイルアーカイブです。レイヤーには、ライブラリ、 カスタムランタイム 、データ、または設定ファイルを含めることができます。レイヤーを使用すると、コードの共有と責任の分離を促進し、ビジネスロジックの記述をより迅速に繰り返すことができます。
レイヤーを利用することで
- 複数のlambdaで共通的に利用可能なライブラリを作れる
- ライブラリの依存関係をパッケージ化できる
- zipでコードやデータをアップロードして使える
- レイヤーに持たせることでlambdaにデプロイするデータサイズを削減できる
試してみる
やりたい事は、goのバイナリをLambdaレイヤーに登録してpythonランタイムの関数からの実行です。 レイヤーに登録するGoのコード。これをコンパイルして利用しました。
package main

import "fmt"

func main() {
    fmt.Println("hello world lambda layer")
}
次はlambdaのレイヤーを作成するためのzipを用意します。
Lambda レイヤーの作成と共有 - AWS Lambda
このドキュメントの ライブラリの依存関係をレイヤーに含める の項目に
すべてのランタイムは /bin にPATHが通っているようなので、 ./bin/main にバイナリを配置して
zip化しました。
❯ ls
bin     main.go
❯ ls bin/
main
❯ zip -r go-cmd.zip bin
今回はAWSコンソールからポチポチしてレイヤーを作成しました。


レイヤーをLambda関数に追加して利用できる状態になったのでPythonでgoバイナリを実行します。 利用したのは以下のコードです。
- lambda_function.py
import subprocess
def lambda_handler(event, context):
    cmd = ['main']
    out = subprocess.run(cmd, stdout=subprocess.PIPE)
    print(out.stdout.decode())
■ 実行結果
Function Logs
START RequestId: 68838428-bb76-4af7-86ab-4805669c676f Version: $LATEST
hello world lambda layer
END RequestId: 68838428-bb76-4af7-86ab-4805669c676f
hello world lambda layer
と表示されて実行できました。
レイヤーをバージョン管理する
レイヤーをコード管理する場合にバージョン管理する必要が出てくると思います。 そこで、バージョンに対してcommit-idやtag名などを付与できるか確認しました。
lambdaレイヤーを更新するために aws-cliを利用しました。(publish-layer-version)
awscli.amazonaws.com
バージョンは1からインクリメントされていくので、レイヤーを更新するときに description オプションを付与して仮のtag名(v0.0.1)を付与しました。
github actionsのworkflowを利用していればtag pushをトリガーにtag名を取得してレイヤーを更新するときに descriptionに付与できます。
- lambdaレイヤーを更新するコマンド (aws-vaultを利用した場合)
❯ aws-vault exec ${profile} -- aws lambda publish-layer-version \
  --layer-name go-cmd \
  --description "v0.0.1" \
  --zip-file fileb://go-cmd.zip \
  --compatible-runtimes python3.9
新しくレイヤーを更新したら以下のようになりました。説明の部分に v0.0.1 タグを埋め込めるので何のバージョンのものかすぐにわかるようにできそうです。

APIGateway + Lambda + Go(Echo)をSAM(Serverless Application Model)でAWSとローカルにデプロイする
はじめに
前回、APIGW + Lambda + Go(Echo)のローカル環境をSAMで構築しました。 今回は、samでローカルではなく、AWS環境にデプロイをしました。ローカルも同じ設定で利用可能です。
本記事ではAWSにデプロイする部分にだけ記載します。詳細は↑の記事に記載済みです。
また、LambdaでGoフレームワークのEchoを動かす事についてまとめた記事は↓。
コード
ディレクトリ構成
serverless-sam-go-local
├── README.md
└── serverless
    ├── README.md
    ├── echo
    │   ├── Makefile
    │   ├── api
    │   │   └── healthcheck
    │   │       └── healthcheck.go
    │   ├── conf
    │   │   └── config.go
    │   ├── echo
    │   ├── go.mod
    │   ├── go.sum
    │   ├── handler
    │   │   └── auth
    │   │       └── auth.go
    │   └── main.go
    ├── events
    │   └── event.json
    ├── samconfig.toml
    └── template.yaml
ソースコードはこちら。 github.com
APIGWとLambdaの設定
- 設定したこと
- リソースポリシー(IP制限)
- リソースポリシーはこちらを参照: ResourcePolicyStatement - AWS Serverless Application Model
- REST API
/api/*のパスを用意- ステージ名を
v1
- リソースポリシー(IP制限)
template.yaml
AWSTemplateFormatVersion: '2010-09-09'
Transform: AWS::Serverless-2016-10-31
Description: >
  description

Globals:
  Function:
    Timeout: 30

Resources:
  MyAPI:
    Type: AWS::Serverless::Api
    Properties:
      Name: sam-echo-test
      StageName: v1
      EndpointConfiguration: REGIONAL

  SAMEchoFunction:
    Type: AWS::Serverless::Function
    Properties:
      CodeUri: echo
      Handler: echo
      Runtime: go1.x
      Architectures:
        - x86_64
      Events:
        GetApi:
          Type: Api
          Properties:
            Path: /api/{proxy+}
            Method: get
            RestApiId: !Ref MyAPI
            Auth:
              ResourcePolicy:
                CustomStatements: [{
                  "Effect": "Allow",
                  "Principal": "*",
                  "Action": "execute-api:Invoke",
                  "Resource": "arn:aws:execute-api:ap-northeast-1:*:*/*",
                  "Condition": {
                    "IpAddress": {
                      "aws:SourceIp": "X.X.X.X/32"
                    }
                  }
                }]
      #Environment:
      #  Variables:
      #    PARAM1: VALUE
デプロイ
AWSにデプロイする
初回実行に初期設定が必要なため --guided オプションを付与して、2回目以降の設定反映には不要です。
❯ aws-vault exec my-dev -- sam deploy --guided

Configuring SAM deploy
======================

        Looking for config file [samconfig.toml] :  Not found

        Setting default arguments for 'sam deploy'
        =========================================
        Stack Name [sam-app]: sam-echo-test
        AWS Region [ap-northeast-1]:
        #Shows you resources changes to be deployed and require a 'Y' to initiate deploy
        Confirm changes before deploy [y/N]: y
        #SAM needs permission to be able to create roles to connect to the resources in your template
        Allow SAM CLI IAM role creation [Y/n]: y
        #Preserves the state of previously provisioned resources when an operation fails
        Disable rollback [y/N]: y
        HelloWorldFunction may not have authorization defined, Is this okay? [y/N]: y
        Save arguments to configuration file [Y/n]: y
        SAM configuration file [samconfig.toml]:
        SAM configuration environment [default]: dev

        Looking for resources needed for deployment:
        Creating the required resources...
        Successfully created!
(処理の進捗が表示されるので省略)
生成されたsamconfig.tomlの中身は以下のとおりになりました。 スタック名やawsのリソース情報などが記載されています。
- samconfig.toml
version = 0.1
[dev]
[dev.deploy]
[dev.deploy.parameters]
stack_name = "sam-echo-test"
s3_bucket = "aws-sam-cli-managed-default-samclisourcebucket-xxxxxxxx"
s3_prefix = "sam-echo-test"
region = "ap-northeast-1"
confirm_changeset = true
capabilities = "CAPABILITY_IAM"
disable_rollback = true
image_repositories = []
作成したstackを削除する場合は sam delete コマンドを実行する
sam deleteを実行するとstack名を問われるので入力する
❯ aws-vault exec my-dev -- sam delete
        Enter stack name you want to delete: sam-echo-test
        Are you sure you want to delete the stack sam-echo-test in the region ap-northeast-1 ? [y/N]: y
        Are you sure you want to delete the folder sam-echo-test in S3 which contains the artifacts? [y/N]: y
        - Deleting S3 object with key sam-echo-test/xxxxxxxx
        - Deleting S3 object with key sam-echo-test/xxxxxxxx.template
        - Deleting Cloudformation stack sam-echo-test

Deleted successfully
awsのAPIGWのエンドポイントに対してAPIコールしてOKを確認
❯ curl https://xxxxxxxxxx.execute-api.ap-northeast-1.amazonaws.com/v1/api/healthcheck
{"status":200,"message":"Success to connect echo"}
ローカルにデプロイする
template.yamlを特に変更せずlocalに展開するコマンドを実行してました。
❯ sam local start-api
Mounting SAMEchoFunction at http://127.0.0.1:3000/api/{proxy+} [GET]
You can now browse to the above endpoints to invoke your functions. You do not need to restart/reload SAM CLI while working on your functions, changes will be reflected instantly/automatically. You only need to restart SAM CLI if you update your AWS SAM template
2022-11-05 16:44:31  * Running on http://127.0.0.1:3000/ (Press CTRL+C to quit)
動作確認でヘルスチェックAPIを実行してOK
❯ curl http://127.0.0.1:3000/api/healthcheck
{"status":200,"message":"Success to connect echo"}
さいごに
今回、SAMを使ってローカルとAWSにサーバレス環境をデプロイしました。 SAMの機能をまだまだ使いこなせていきたいので他にも試していきたいと思います。
APIGateway + Lambda + Go(Echo)で開発するためのローカル環境をSAM(Serverless Application Model)で再現する
はじめに
前回の記事では、サーバレス環境をローカルに用意するためにserverless frameworkを利用しました。そこで今回はSAMを利用して同じ環境を構築してみます。
基本的にServerlessFrameworkを利用してきたのでSAMを使うのは今回が初めてでした。
構成は Client --> APIGW --> Lambdaで進めます。
ローカル環境構築
brew tap aws/tap
brew install aws-sam-cli
今回はGoで環境構築するので go1.xをruntimeに指定してプロジェクトを作成します。
❯ sam init --runtime go1.x --name serverless
Which template source would you like to use?
    1 - AWS Quick Start Templates
    2 - Custom Template Location
Choice: 1

Choose an AWS Quick Start application template
    1 - Hello World Example
    2 - Infrastructure event management
    3 - Multi-step workflow
Template: 1

Based on your selections, the only Package type available is Zip.
We will proceed to selecting the Package type as Zip.

Based on your selections, the only dependency manager available is mod.
We will proceed copying the template using mod.

Would you like to enable X-Ray tracing on the function(s) in your application?  [y/N]: n

Cloning from https://github.com/aws/aws-sam-cli-app-templates (process may take a moment)
sam-initすると自動でディレクトリとファイルが作成されます。今回は hello-world を削除して echo ディレクトリを配置しました。
こちらは前回の記事と同じもので、echoフレームワークでヘルスチェックAPIを実装しています。
ソースコードはこちらです。
ディレクトリ構成
serverless
├── README.md
├── echo
│   ├── Makefile
│   ├── api
│   │   └── healthcheck
│   │       └── healthcheck.go
│   ├── conf
│   │   └── config.go
│   ├── echo
│   ├── go.mod
│   ├── go.sum
│   ├── handler
│   │   └── auth
│   │       └── auth.go
│   └── main.go
├── events
│   └── event.json
└── template.yaml
echoフレームワークの部分は前回の記事になどに記載していますので今回は省略します。 goをコンパイルするときに利用するMakefileと samを実行する template.yaml のコードを記載します。
- echo/Makefile
PHONY: deps clean build

deps:
    go get -u ./...

clean:
    rm -rf echo # 変更

build:
    GOOS=linux GOARCH=amd64 go build -o echo ./main.go
- template.yaml (
# 修正の部分を自動生成されたファイルを修正しました)
AWSTemplateFormatVersion: '2010-09-09'
Transform: AWS::Serverless-2016-10-31
Description: >
  description

# More info about Globals: https://github.com/awslabs/serverless-application-model/blob/master/docs/globals.rst
Globals:
  Function:
    Timeout: 30 # 修正

Resources:
  HelloWorldFunction:
    Type: AWS::Serverless::Function # More info about Function Resource: https://github.com/awslabs/serverless-application-model/blob/master/versions/2016-10-31.md#awsserverlessfunction
    Properties:
      CodeUri: echo # 修正
      Handler: echo # 修正
      Runtime: go1.x
      Architectures:
        - x86_64
      Events:
        CatchAll:
          Type: Api # More info about API Event Source: https://github.com/awslabs/serverless-application-model/blob/master/versions/2016-10-31.md#api
          Properties:
            Path: /api/{proxy+} # 修正
            Method: GET
      Environment: # More info about Env Vars: https://github.com/awslabs/serverless-application-model/blob/master/versions/2016-10-31.md#environment-object
        Variables:
          PARAM1: VALUE

Outputs:
  # ServerlessRestApi is an implicit API created out of Events key under Serverless::Function
  # Find out more about other implicit resources you can reference within SAM
  # https://github.com/awslabs/serverless-application-model/blob/master/docs/internals/generated_resources.rst#api
  HelloWorldAPI:
    Description: "API Gateway endpoint URL for Prod environment for First Function"
    Value: !Sub "https://${ServerlessRestApi}.execute-api.${AWS::Region}.amazonaws.com/Prod/hello/"
  HelloWorldFunction:
    Description: "First Lambda Function ARN"
    Value: !GetAtt HelloWorldFunction.Arn
  HelloWorldFunctionIamRole:
    Description: "Implicit IAM Role created for Hello World function"
    Value: !GetAtt HelloWorldFunctionRole.Arn
このtemplate.yamlですが、AWSに展開することも考えて以下のように書き換えました。どちらもローカルでは同じ動きをします。
- template.yaml
AWSTemplateFormatVersion: '2010-09-09'
Transform: AWS::Serverless-2016-10-31
Description: >
  description

Globals:
  Function:
    Timeout: 30

Resources:
  MyAPI:
    Type: AWS::Serverless::Api
    Properties:
      Name: sam-echo-test
      StageName: v1
      EndpointConfiguration: REGIONAL

  SAMEchoFunction:
    Type: AWS::Serverless::Function
    Properties:
      CodeUri: echo
      Handler: echo
      Runtime: go1.x
      Architectures:
        - x86_64
      Events:
        GetApi:
          Type: Api
          Properties:
            Path: /api/{proxy+}
            Method: get
            RestApiId: !Ref MyAPI
            Auth:
              ResourcePolicy:
                CustomStatements: [{
                  "Effect": "Allow",
                  "Principal": "*",
                  "Action": "execute-api:Invoke",
                  "Resource": "arn:aws:execute-api:ap-northeast-1:*:*/*",
                  "Condition": {
                    "IpAddress": {
                      "aws:SourceIp": "X.X.X.X/32"
                    }
                  }
                }]
      #Environment:
      #  Variables:
      #    PARAM1: VALUE
デプロイと動作確認
❯ make build
GOOS=linux GOARCH=amd64 go build -o echo ./main.go
- ローカルでsam実行
❯ sam local start-api

Mounting HelloWorldFunction at http://127.0.0.1:3000/api/{proxy+} [GET]
You can now browse to the above endpoints to invoke your functions. You do not need to restart/reload SAM CLI while working on your functions, changes will be reflected instantly/automatically. You only need to restart SAM CLI if you update your AWS SAM template
2022-11-03 16:35:45  * Running on http://127.0.0.1:3000/ (Press CTRL+C to quit)

Invoking echo (go1.x)
Skip pulling image and use local one: public.ecr.aws/sam/emulation-go1.x:rapid-1.61.0-x86_64.

Mounting /Users/hidetoshi/github-repos/github.com/yhidetoshi/serverless-sam-go-local/serverless/echo as /var/task:ro,delegated inside runtime container
START RequestId: 22427e50-7eb8-425a-a06e-2739449f6d7a Version: $LATEST
2022/11/03 07:38:23 echo cold start
END RequestId: 22427e50-7eb8-425a-a06e-2739449f6d7a
REPORT RequestId: 22427e50-7eb8-425a-a06e-2739449f6d7a  Init Duration: 113.63 ms        Duration: 735.62 ms     Billed Duration: 736 ms Memory Size: 128 MB     Max Memory Used: 128 MB
2022-11-03 16:38:23 127.0.0.1 - - [03/Nov/2022 16:38:23] "GET /api/healthcheck HTTP/1.1" 200 -
- clientからヘルスチェクAPIを実行
❯ curl http://127.0.0.1:3000/api/healthcheck
{"status":200,"message":"Success to connect echo"}
リクエスト実行中には以下のコンテナが起動して lambdaをエミュレートして処理終了したらコンテナは削除されました。
❯ docker ps
CONTAINER ID   IMAGE                                                    COMMAND                  CREATED        STATUS                  PORTS                      NAMES
7eb1599fd838   public.ecr.aws/sam/emulation-go1.x:rapid-1.61.0-x86_64   "/var/rapid/aws-lamb…"   1 second ago   Up Less than a second   127.0.0.1:5959->8080/tcp   focused_wilson
(追記) ローカルではなく、AWSにデプロイする方法については、↓の記事にまとめました。
さいごに
前回の記事と同様にサーバーレス環境(APIGW + Lambda + Go(echo))のローカル環境を構築することができました。 この程度のローカル環境を構築するだけだと SAMとServerlessFrameworkはほとんど負担感は変わらない感じでした。 ServerlessFrameworkとSAMで機能や特徴が異なると思うので構築する環境で使い分けていければと思います。
APIGateway + Lambda + Go(Echo)で開発するためのローカル環境をServerlessFrameworkで再現する
はじめに
以前の記事で APIGW + Lambdaで GoのフレームワークであるEchoを動かす検証を実施しました。 実際にデプロイすることができたので今回は開発を行うためにローカル環境をServerlessFrameworkで構築しました。
構成
Client --> APIGW --> Lambda(Goコンテナ)
をローカル環境に構築します。ServerlessFrameworkで実行すれば、この構成を簡単に用意できます。
ローカル環境
serverless-offlineをインストールする
npm install --save-dev serverless-offline
- プロジェクトを作成する
sls create -t <テンプレート> -n <プロジェクト名>
sls create -t aws-go -n serverless-echo-lambda
*) テンプレートについては以下が対応していました。色々ありますね。
Supported templates are: "aws-clojure-gradle", "aws-clojurescript-gradle", "aws-nodejs", "aws-nodejs-docker", "aws-nodejs-typescript", "aws-alexa-typescript", "aws-nodejs-ecma-script", "aws-python", "aws-python3", "aws-python-docker", "aws-groovy-gradle", "aws-java-maven", "aws-java-gradle", "aws-kotlin-jvm-maven", "aws-kotlin-jvm-gradle", "aws-kotlin-jvm-gradle-kts", "aws-kotlin-nodejs-gradle", "aws-scala-sbt", "aws-csharp", "aws-fsharp", "aws-go", "aws-go-dep", "aws-go-mod", "aws-ruby", "aws-provided", "tencent-go", "tencent-nodejs", "tencent-python", "tencent-php", "azure-csharp", "azure-nodejs", "azure-nodejs-typescript", "azure-python", "cloudflare-workers", "cloudflare-workers-enterprise", "cloudflare-workers-rust", "fn-nodejs", "fn-go", "google-nodejs", "google-nodejs-typescript", "google-python", "google-go", "kubeless-python", "kubeless-nodejs", "knative-docker", "openwhisk-java-maven", "openwhisk-nodejs", "openwhisk-php", "openwhisk-python", "openwhisk-ruby", "openwhisk-swift", "spotinst-nodejs", "spotinst-python", "spotinst-ruby", "spotinst-java8", "twilio-nodejs", "aliyun-nodejs", "plugin", "hello-world".
プロジェクト作成コマンドを実行すると自動で以下が作成されました。
❯ tree .
.
├── Makefile
├── hello
│   └── main.go
├── serverless.yml
└── world
    └── main.go
今回は、前回の記事で作成したコードを利用するので、サンプルで自動作成された hello/ と world のディレクトリを削除しました。
今回用意したディレクトリ構成は以下になります。Echoで ヘルスチェックのAPIを実装しており、ソースコードはこちらのGitHubにあります。
- ディレクトリ構成
❯ tree .
.
├── Makefile
├── README.md
├── api
│   └── healthcheck
│       └── healthcheck.go
├── bin
│   └── main
├── conf
│   └── config.go
├── go.mod
├── go.sum
├── handler
│   └── auth
│       └── auth.go
├── main.go
└── serverless.yml
- serverless.ymlも自動で作成されますが、以下のとおりに変更しました。
- "追記" の部分を追加しています。自動作成されたコメント部分は削除しています。
pluginsでserverless-offlineを指定しますcustomでuseDockerで trueを指定しますtimeoutはデフォルト値では timeoutになってしまったので定義しました- 主な原因は、Lambda(go) のコンテナを起動するのに時間がかかるためでした
- 利用されるコンテナイメージ: https://hub.docker.com/r/lambci/lambda
service: serverless-echo-lambda
frameworkVersion: '3'

# 追記
custom:
  serverless-offline:
    useDocker: true

provider:
  name: aws
  runtime: go1.x
  stage: v1 #追記
  timeout: 30 #追記

package:
  patterns:
    - '!./**'
    - ./bin/**

functions:
  main:
    handler: bin/main
    events:
      - http: # RESTAPI
          path: /api/{proxy+}
          method: get
# 追記
plugins:
  - serverless-offline
デプロイと動作確認
.PHONY: build clean deploy deploy-local

build:
    env GOARCH=amd64 GOOS=linux go build -ldflags="-s -w" -o bin/main ./main.go

clean:
    rm -rf ./bin

deploy-local: build
    sls offline

deploy: clean build
    sls deploy --verbose
- ローカル環境を起動します。
sls offline- goのコードをコンパイルしてデプロイする場合は
make deploy-localでもOK
❯ sls offline


Starting Offline at stage v1 (us-east-1)

Offline [http for lambda] listening on http://localhost:3002
Function names exposed for local invocation by aws-sdk:
           * main: serverless-echo-lambda-v1-main

   ┌────────────────────────────────────────────────────────────────────────┐
   │                                                                        │
   │   GET | http://localhost:3000/v1/api/{proxy*}                          │
   │   POST | http://localhost:3000/2015-03-31/functions/main/invocations   │
   │                                                                        │
   └────────────────────────────────────────────────────────────────────────┘

Server ready: http://localhost:3000 🚀
- ヘルスチェックAPIをコールする
❯ curl http://localhost:3000/v1/api/healthcheck
{"status":200,"message":"Success to connect echo"}
リクエストを投げると Dockerイメージを起動してからリクエストを受け付けてくれました。リクエスト終了後に確認したら割とすぐにコンテナは停止していました。
❯ docker ps
CONTAINER ID   IMAGE     COMMAND   CREATED   STATUS    PORTS     NAMES

❯ curl http://localhost:3000/v1/api/healthcheck
{"status":200,"message":"Success to connect echo"}%

❯ docker ps
CONTAINER ID   IMAGE                 COMMAND                  CREATED         STATUS         PORTS                     NAMES
8179a26361e2   lambci/lambda:go1.x   "/var/runtime/aws-la…"   4 seconds ago   Up 3 seconds   0.0.0.0:53718->9001/tcp   great_grothendieck
- APIGWの機能はServerlessFrameworkで再現してくれています。
- serverlessFrameworkが 3000番Listenして apigw --> lambdaコンテナに接続されています
❯ sudo lsof -i -P | grep "LISTEN" | grep 3000
node      44358       hidetoshi   32u  IPv6 0x8764e5xxxxxxxxxx      0t0    TCP localhost:3000 (LISTEN)
さいごに
今回は、ServerlessFrameworkで Client --> APIGW --> Lambda(Echo) の環境をローカルに再現しました。
ローカルでAWS環境を再現して開発できるのはとても便利ですね。